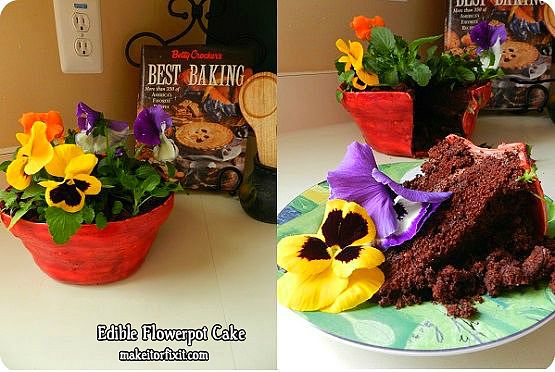
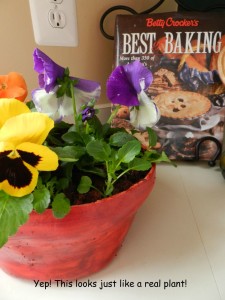
Okay. I had to make this! It was too interesting not to make! Everything on this cake is edible. Who knew that pansies were edible and the leaves! Of course, we’re not going to eat them, though. But, you have to admit that when you see this flowerpot, it actually looks like a real plant. I was sitting in Barnes & Noble on Sunday, waiting for my teenager to finish volunteering at this place, flipped through Food Network Magazine, and stopped on the page with this cake in the April 2013 issue. I knew I had to try it. Of course, I changed quite a few things from the original recipe. Some things didn’t seem necessary per the magazine’s instruction. You can make this cake and you don’t actually have to be a cake decorator to do it. It’s not as detailed as it seems. The toughest part is going to be working with the fondant. It’s not an expensive item to make either if you have most of the stuff on hand. The only thing that you will probably need to buy will be the fondant and the gel coloring. I got the fondant from Michaels (make sure that you have your 40% or 50% off coupons). So, if you’re feeling adventurous, follow the directions below! Preheat your oven to 350 degrees.
Ingredients:
- 16.5 oz box devil’s food cake (all other necessary items for baking a cake)
- 16 oz tub chocolate frosting
- 3 tablespoons unsweetened cocoa powder
- 1 24oz box of white fondant
- 3/4 teaspoon red icing food color (I used twice the amount here because I made 2 mixes)
- 1/4 teaspoon orange icing food color (I used twice the amount here because I made 2 mixes)
- edible plants: pansies or nasturtiums and/or mint sprigs
Directions:
Prepare your cake according to the directions on the box. If you have a 6 inch and an 8 inch baking pan, please use. If not, use two 8 inch pans and cut later to 6 inches. The only thing I changed is that I added about a cup of semi-sweet chocolate chips. When we have chocolate cake, we like to really have chocolate. Let cool, as per directions.
Level the top of each cake. Since, I did not have a 6 inch pan, I used two 8 inch pans and cut one of the cakes into a 6 inch size. You want to make them even across the top. The parts that you cut off will be used as the dirt for the top of the cake.
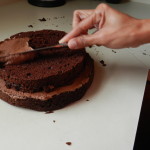
Frost the top of each cake. It’s always hard to frost a cake when you level off the top part.
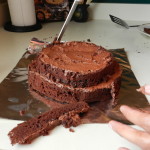
Begin trimming the cake around into a pot shape. Then frost all the way around the shape. Put into the freezer after frosting around cake. Let it stay in the freezer for 30 minutes. You can begin working on the fondant.
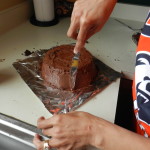
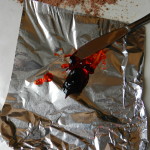
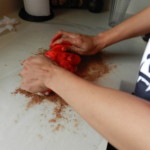
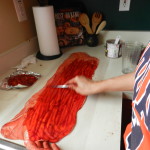
Mix the colors together to form the color for the pot. I had to make two mixtures of this because one wasn’t enough. Put cocoa powder on surface to prevent fondant from sticking. I tried kneading the color into the fondant at first, but it wouldn’t blend completely. The directions actually asked for food coloring gel, but I bought icing coloring because it was cheaper. When you buy gel food coloring, it comes in a box with primary colors and then a separate box with other colors. It didn’t have a box with both colors that I needed and it was too expensive for me to buy two. So, I went with the icing coloring which was cheaper. After you finish getting color worked in, roll out to 24 x 6.5 inches.
Since, kneading didn’t working for getting the color worked in, I decided to make another color mixture and spread it across the fondant. Let it dry if you decide to do it this way. I actually used a blow dryer on cool to help it along. I’m almost certain that you shouldn’t do that. LOL. Trim the edges so that they are straight and even. Cut off a 24 x 1.5 inch strip which will be used as the strip at the top of the pot.
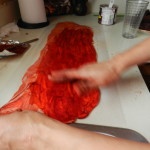
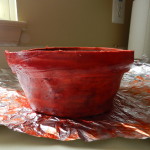
Sorry, I don’t have a pic of me wrapping the pot. My teenager had gotten tired of me calling her. (Really, she should never get tired of me.) The cake will still be bottoms-up when you wrap the larger piece of strip around it. With the leftover straps, you want to try and knead together to make a round strip to cover the bottom. Since, I am working on aluminum foil, it is easy to flip over. Then, wrap the thin strip around the top. If the fondant is dry, just wet the top edge with a little water and wrap the thin strip around. I managed to get it around and that was a little of a feat. But, it is on there. You should have something of a pot look when you get to this part.
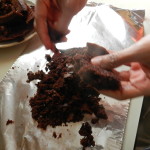
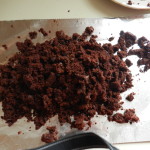
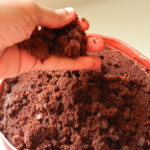
Crumble the part of the cake that you cut off. This is your dirt. Just spread it on top of the chocolate cake, just as you would if you were potting a real plant.
Cut off the roots of the edible plants. Wash them really good. Don’t wash them too hard because you want to keep the flowers looking neat.
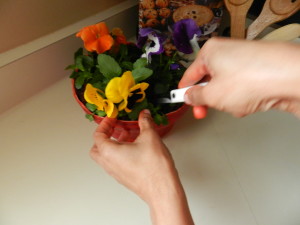
Now, for the cutting photo….
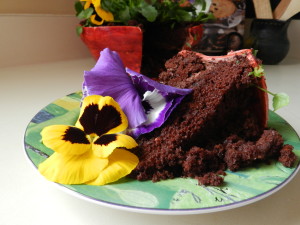
Just slice into your plant for dessert! Check out the slice below!
What do you think? Think I’ll be able to fool someone with that flowerpot cake? This works great if you want to eat out on the deck and then ask someone if they want dessert. Just imagine their face when you start to cut into the flowerpot! I have to say that this cake tastes so good! My kids have eaten half of the cake. They didn’t eat the fondant or the plants. They thought that was crazy. Go ahead and try this! Then, sit back and enjoy the taste!


o my word! this is totally awesome!
pinned
Nicolette Roux recently posted…21 Ideas to Make Fathers Day Special
Thanks Nicolette! That cake was definitely a favorite post of mines.
Sharon, thank you for joining in the cake extravaganza – yours is quite special. I do hope to see you again soon. Cheers
Lovely work, Sharon! Would you be happy to link it in to the current Food on Friday which is all about cakes? This is the link . There are over 40 great links there already. I do hope to see you there. Cheers
Thanks Carole! Would love to come by….
This is super awesome; it looks so real!! I’m going to have to make it for my mom someday because she loves plants and I’m pretty sure she’d love this cake too!
Martha recently posted…World Book Night 2013 and Book Recommendations
Hi Martha! You should definitely make it for your mom. It would be a great surprise for her.
hey now that’s one plant i wouldn’t mind taking care of! heehee
Lisa@hooplapalooza recently posted…cinco de mayo sombrero men glasses
Hi Lisa! Thanks for visiting…that cake was so delicious!
Just wanted you to know that the party is on Friday (tomorrow) with your feature! but, you can grab a feature button off the submit page too if you like.
Theresa @DearCreatives recently posted…Updating Bathroom Decor? Look To Moen
Thanks Theresa! Grabbed the “I Was Featured button” and put it in my sidebar! Will definitely be stopping in for the party on tomorrow! Can’t wait…
Hi Sharon, I almost thought that was a real pot at first. You did an amazing job. I bet it was yummy! This is the perfect spring baking tutorial. I will be featuring your post tomorrow @ DearCreatives.com thanks for sharing & linking up! (you can drop by to see it & pick up a featured button or email me & I can send you it if you like)
Theresa @DearCreatives recently posted…Updating Bathroom Decor? Look To Moen
Thanks Theresa! I’m being featured…yaaaay! I am so excited. I’m coming right over to pick up that featured button. Again, thanks for the Feature….
OMG!!! It does look like a real plant. HOW Beautiful! I may hint this to my kids to make for me on Mom’s Day :). Thank you so much for sharing this at The Show Off Blog Party! Hope to see you again next week!
Jessica
The Wondering Brain
Jessica recently posted…My Favorite Posts SHOW OFF Weekend Blog Party #1
Thanks Jessica! Enjoyed the The Show Off Blog Party. Will definitely be back next week…
impressive – a conversation starter for sure!
great cake for Mother’s Day! Looks so cool!
Hi Krystie! This would make a great Mother’s Day cake!
Too cute to eat. I must give you credit for taking the time to make it. Thank you for sharing.
Consider yourself hugged.
http://simpleesue.com/try-one-new-recipe-a-week-bed-and-breakfast-cherry-crumb-coffee-cake/
Simplee Sue recently posted…Frivolous Friday – Bacon Corn Pancakes
Hi Sue! It was too cute to eat. However, it was so delicious!
What a great idea! This can be awesome for a gift, then you have cake and flowers all in one 🙂 Thanks for sharing at LinkLoveThursday party.
Gosia @www.kiddiefoodies.com
Gosia recently posted…How to become Kiddie Foodie
Hi Gosia! It could definitely be a great gift! P.S. Love the panda dessert!
Hi Sharon
Thank you so much for stopping by my blog – it is lovely to meet you.
I have to say, this cake is just amazing – pinning immediately, just love it!
Have a wonderful day.
Kate x
Kate at Home
Kate recently posted…Blueberry Muffins
Thanks Kate! It was so delicious, too!
Wow! What an awesome idea! Definitely pinning this one!
Nancy@ThereIsGrace recently posted…1,000 Gifts: Naming Them
Thanks Nancy! Thanks for pinning, too.
What a great idea for spring!! It looks so good too!
Katie recently posted…Princess Pre-K Pack
Thanks Katie! I might have to make this again when the weather is warmer.
That flower pot cake looks awesome! I have to try it. That is something I have never seen but it looks great. If it works out I try it a social event I have coming up. Thanks for the advice and thanks for the visit.
Leona Lawrence recently posted…Remembering Easter
Thanks Leona! Definitely use it for your social event. It will definitely be a hit.
Oh, I forgot to mention that I am now following your Blog. Take care.
Judy Haughton-James recently posted…Question Time
Thanks for following. Enjoyed checking out your blog.
Wow! This looks so-o-o good! Thanks for sharing and Happy Easter!
Judy Haughton-James recently posted…Question Time
Thanks Judy! Happy Easter!
This is just one of a kind! wait, this is just plain awesome! I will definitely try this out. Thanks for sharing Sharon 🙂
vinma recently posted…Her Daddy Fixation
Thanks Vinma! You must try it!
I have never seen anything like this! I just love it.
I have a link party that starts on Monday evenings at 7:00 p.m. EST. I would love it if you would bring this great recipe by and link up! Add some of your other recipes, crafts and DIY projects too! It is called the In and Out of the Kitchen Link party.
Also, check my blog tonight (9:00 p.m. EST) and link up for the Sharing is Caring Mother’s Day event! I know you will be able to wow us!
Glad you stopped by my blog, I am now a follower of yours.
Cynthia at http://FeedingBig.com
Cynthia L recently posted…Living Big on Less Money – Cost of bread
Thanks Cynthia! I’ll definitely keep the link party on Monday in mind. Thanks for the invite!
OMG that looks great. I would love to try it and bring it as a gift to a party.
Thanks for visiting my blog tajoon.com
Following you back
Thanks Loubna! You should definitely try it!
Bahahaha! This cracks me up! And the fact that it tastes good is awesome. With April Fool’s around the corner, this could be one delightfully tasty practical joke. I can imagine setting it on the table for your family dinner as decoration, and then seeing their faces as you served dessert!
Vanessa@cashcowcouple.com recently posted…Why You Probably Can’t Afford a Dog
Wouldn’t that be hilarious! Fun and tasty!
Saw you on Duck n’a Row- wow! This would be perfect for a baby or bridal shower- so gorgeous!
Sarah recently posted…Vegetarian Recipe Round-Up
Thanks Sarah! It would make a perfect dessert for a shower. Can’t wait to stop by and visit your blog. The title sounds so interesting!
Hi, Sharon. That looks absolutely beautiful and delicious. Who would think that you could get so creative with baking. It almost is a shame to eat it when it’s so pretty. Thanks so much for passing by and commenting on my latest post. Looking forward to sharing and getting to know each other through our blogs. Have a great day.
Maria-Tough Cookie Mommy recently posted…Let #AngelSoft Create Balance In Your Household!
Thanks Maria! It was kind of a shame to eat it, but oh-so good. I look forward to visiting your blog often and getting to know each other.
So beautiful and creative
I agree that it looks too good to eat
Thank you Bismah! We didn’t want to eat it, but we couldn’t help ourselves.
i absolutely LOVE this cake! you did a fabulous job!! perfect for spring and those edible plants make it! i need to attempt this for sure 🙂 pinning!!
Amanda recently posted…Me Likey ERGE Footwear
Thanks Amanda. I definitely enjoyed making it. Thanks for pinning!
It looks too pretty to eat! It would make for a great April Fool’s Day treat. =0) I can imagine giving it to my mom (total plant lover) and then watching her poor face as I cut into it…Oh gosh…I’m almost falling outta my chair already!
~Kim
http://www.2justByou.com
Kim @2justByou recently posted…Words for my Wednesday
That’s sounds like a good trick. I can see her face too!
How pretty! And it looks so scrummy too!
Happy Thursday!
Thanks Veronica! It was definitely scrummy!
Beautiful cake! I love that edible flowers are used, great idea!
Foodie in WV recently posted…Campbell’s Go Soups Review
Thank you! It turned out great!
I love it great idea. New follower on Twitter found you on A Mom’s Point of View
Thanks Miriam. It was so interesting to make!
New follower! Pansies are so beautiful. We have the same taste in flowers! Why don’t you come by and add this link to my blog hop? I’d love it if you would.
Sinea Ducks ‘n a Row
Sinea Pies recently posted…Wonderful Wednesday Blog Hop #14
Yes, pansies are very beautiful. Thanks for the invite.
Wow, that is so cool! I have to share this!
Ronda recently posted…We Went to Gatorland for the Umpteenth Time
Thanks Ronda! I enjoyed making it! By all means, share. Will be popping over to check out your blog for sure.
I nominated you for a Liebster Blog Award, see the details on my blog at http://www.amommyspointofview.blogspot.com/2013/03/liebester-blog-award.html#more
KayK recently posted…Liebester Blog Award
Thanks for the nomination! Someone else nominated my blog too. I’m feeling pretty lucky right about now. Will definitely check it out!
Dang – I’m impressed!! That looks just like a plant!
I’m lucky to bake a sheet cake and get it frosted!!!
Kim recently posted…A Life of Moderation or a Life of Extremes – Can the 2 Combine??
Thanks Kim! My kids enjoyed it too. Had to get rid of the flowers on the first day because they only last for a couple of hours. But, a lot of fun to bake.
Thanks for spotlighting me! Just checked it out on your site.